PlayStation 1 (PSX) modchip
I got my hands on an old PlayStation 1 - one of the oldest models named SCPH-1002 with PU-8 motherboard. I got nothing for it, also no games. I bought a controller, a memory card for game saves, and a new CD drive, because the old one was really worn out. PlayStation can also play audio CDs, which it did excellent. However, I was interested if it would play games. I didn't have any original CD but wanted to try some game, so I fired up google with query "PS1 modchip" and browsed the results.
Finally I found an interesting open source project - PsNee - with discussion in a forum. The fact that it uses Arduino (or Atmel microcontroller) is really great. No PIC and no hard-to-get components. Personally I am no Arduino owner, but I have plenty of Atmel chips.
My choice was ATtiny85V as it was officially supported by PsNee authors. Source code is, however, written for Arduino, so it cannot be copied inside Atmel Studio and be manipulated there. You must download Arduino IDE and set it up to compile program for standalone ATtiny85V chip, not for Arduino. Beware - that is an important step - read up on this page how to do it. When Arduino IDE is set up, you set ATtiny85V in menu Board, with frequency 16 MHz, compile the program and export compiled binary. To make it easier for you, I included the output binary - a .hex file - in the zip file you can download here. Flash the .hex file into the chip using your favorite program, such as Atmel Studio or avrdude. Then, set up fuses: High = 0xDF, Low = 0xF1. That does two things compared to factory settings: 1) CKDIV8 = false, chip clock won't be divided by eight, 2) clock source will be PLL clock, full 16 MHz.
After programming the chip, it must be connected to PlayStation mainboard. Meaning of pins on the chip is the following:
PB port / pin / meaning
PB0 5 SQCK
PB1 6 SUBQ
PB2 7 DATA
PB4 3 GATE_WFCK
- 8 Vcc
- 4 GND
Beware, Vcc is 3.5V, not 5V. Connect the chip to the mainboard according to following picture. Note that the picture shows an Arduino board, as it comes from official documentation of PsNee. What's important, are the red labels of signals.
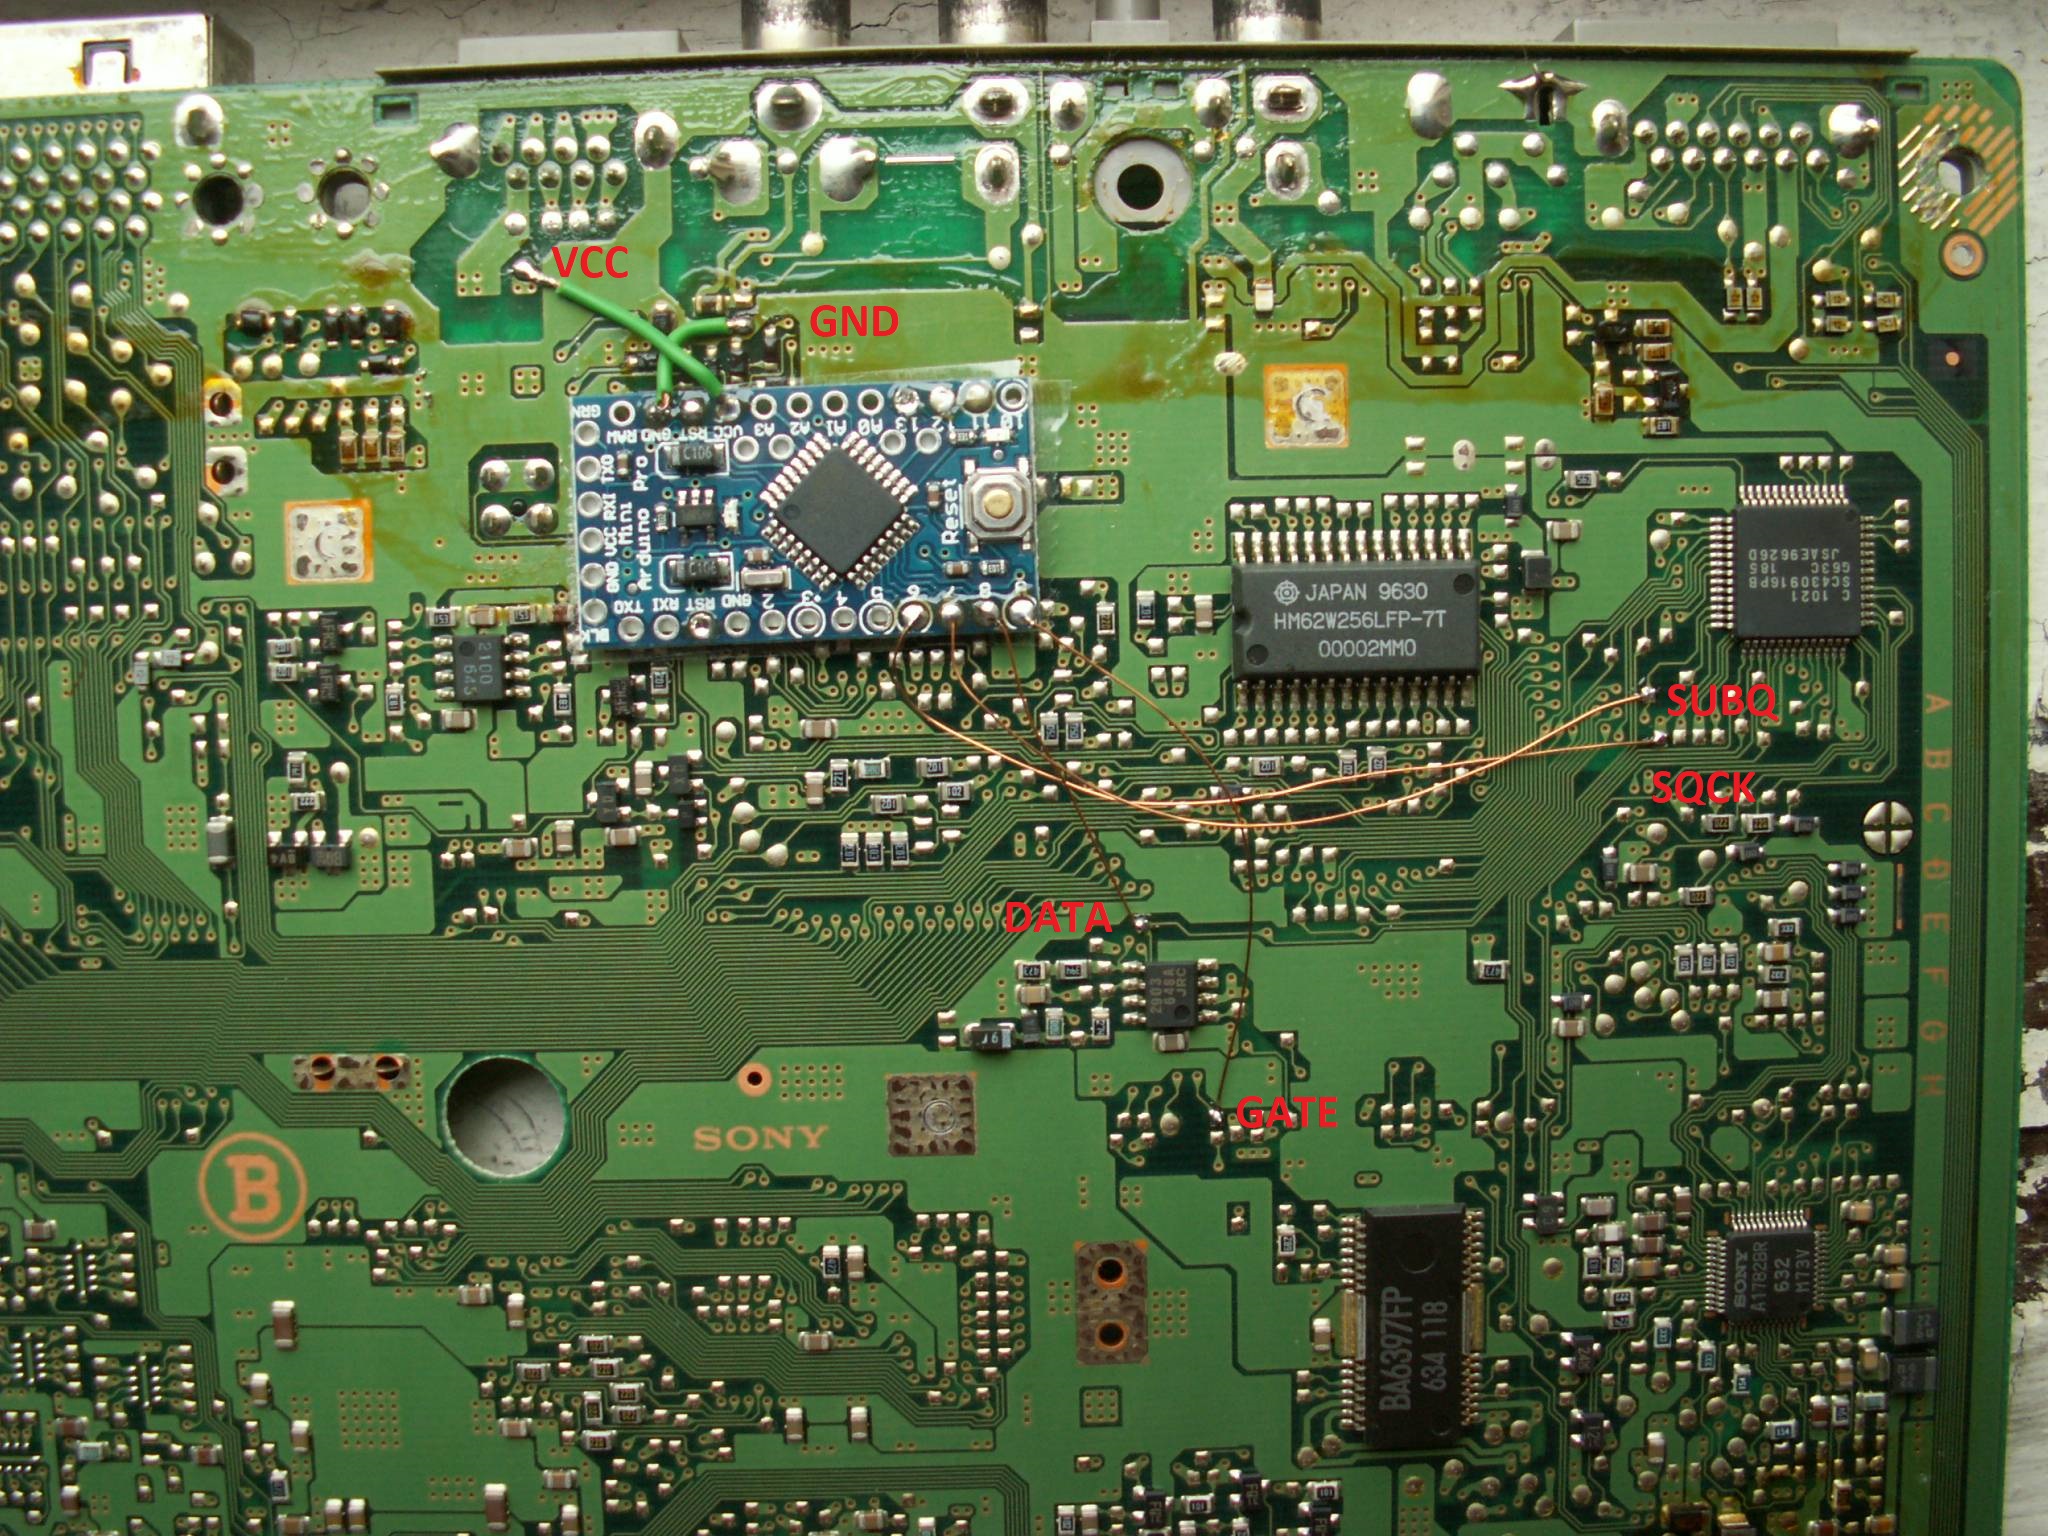
(click the picture for larger version)
And that's pretty much all to do. After re-assembling your PlayStation it should load the game. Modchip works correctly if you see a PlayStation logo instead of the "Insert disc" screen.
Curious how does it all work? From what I have read on the internet, copy protection on PlayStation is a primitive one. Original CDs contain special data at the beginning of the track - a string SCEx (SCEE for European version) while no CD burner can burn this data. On the contrary, PlayStation CD drive can read it. If it does not find this string in the expected place, it rejects the game and shows the infamous "Insert disc" screen.
Modchip detects if the CD drive is in area where this string should be, injects it and so defeats the copy protection.
I was unlucky in that I had to modify the PsNee program, because there was no way it would detect the area where SCEE should be on the CD. I modified the if statement to inject the SCEE string permanently, when it detects any CD that is not an audio CD. This is the modified line from .ino file:
//if (hysteresis >= 14) {
if (scbuf[0] == 0x41) {
Original line is commented out. It probably makes the modchip a non-stealth one, which means that games with additional copy protection won't work. However, it works for me, unfortunately there was no other option... but your mileage may vary.
By the way, the modchip sends serial data on pin 2, which is useful for debugging. Baud rate is 115200. This output can be turned off, but I left it on, as it makes no problems and may be useful.
Good luck hardware hacking your PlayStation. In case of problems, I recommend asking people in the forum.